
Wired vs. Wireless: The Ultimate DIY Guide to Installing Your Smart Video Doorbell
Bringing a smart video doorbell into your home is one of the most impactful upgrades you can make. It’s your new digital gatekeeper, a security camera, and a remote intercom all rolled into one. But before you can enjoy the peace of mind of seeing who’s at your door from anywhere in the world, you face a foundational choice: how will it connect? This isn’t just a minor detail; the decision between a wired or wireless connection will define your doorbell’s reliability, performance, and the path your installation project will take.
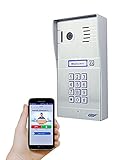
Many guides gloss over this crucial decision, but we’re going to tackle it head-on. This is your ultimate DIY manual. We’ll start by dissecting the pros and cons of Wi-Fi versus a hardwired connection, using a versatile device like the GBF PL963PMPOE, which supports both, as our case study. Then, we’ll roll up our sleeves and walk you through the installation process for each scenario, step-by-step. Whether you’re a seasoned DIYer or a cautious beginner, this guide will empower you to make the right choice and get the job done safely.

Part 1: The Decision – A Wired vs. Wireless Showdown
Before you touch a single tool, let’s make a plan. Your home’s layout, your existing wiring, and your tolerance for a bit of extra work will guide you to the perfect solution.
The Contenders
- Wi-Fi (The Wireless Wonder): Connects to your home network wirelessly. It still needs power, usually from your existing low-voltage doorbell wires or a battery.
- Wired – Existing Wires (The Easy Swap): Uses the two small wires from your old doorbell for power. Data is typically still handled by Wi-Fi.
- Wired – Power over Ethernet (PoE) (The Professional’s Choice): A single Ethernet cable provides both a rock-solid internet connection and all the power the device needs.
Factor 1: Reliability (The Unspoken Truth)
This is the single most important factor. A security device that is intermittently offline is not secure.
* Wi-Fi: Its greatest strength—flexibility—is also its greatest weakness. Wi-Fi signals must travel through walls, doors (often thick, solid ones), and other materials that degrade their strength. As one user review for a smart doorbell noted, “Wifi connectivity drops frequently.” Signal congestion from your neighbors’ networks and router reboots can also cause dropouts.
* PoE: Unbeatable. A physical cable is immune to nearly all forms of interference that plague Wi-Fi. It provides a stable, consistent connection 24/7. When your security is on the line, nothing beats a hardwired link.
Winner: PoE (Wired)
Factor 2: Performance (Speed & Power)
- Wi-Fi: Performance is variable. A strong Wi-Fi signal can deliver crisp video, but a weak or congested signal can lead to laggy video, delayed notifications, and poor audio quality.
- PoE: Consistent, high-speed data transfer for the smoothest video streaming and instant notifications. Furthermore, PoE can deliver significantly more power than traditional doorbell wiring, supporting more advanced features like brighter lights, more powerful processors, and integrated keypads without issue.
Winner: PoE (Wired)
Factor 3: Installation Difficulty & Cost
- Wi-Fi (using existing wires): Easiest. If you have a working doorbell, this is often a 30-minute job. (Difficulty: )
- Wi-Fi (battery-powered): Easiest initial setup, but requires ongoing battery charging/replacement. (Difficulty: )
- PoE: Most difficult. If you don’t already have an Ethernet cable at your door, you’ll need to run one. This can involve drilling, fishing wires through walls, and basic network knowledge. (Difficulty: )
Winner: Wi-Fi
Decision Flowchart: Find Your Perfect Path
Answer these questions to find your best fit:
1. Do you have an existing, working doorbell?
* Yes: Go to Q2.
* No: Your best options are battery-powered Wi-Fi (easiest) or running a new PoE cable (most reliable).
2. How strong is the Wi-Fi signal at your front door? (Test it with a smartphone app like Wi-Fi Analyzer).
* Excellent (-30 to -60 dBm): Using existing wires with Wi-Fi is a great, reliable option.
* Mediocre to Poor (-65 dBm or worse): You will likely experience frustrating dropouts. Your best bet is to run a PoE cable.
3. Are you willing to run a new cable for maximum reliability?
* Yes: PoE is the undisputed champion. Proceed to the PoE installation guide.
* No: Stick with the Wi-Fi option, but be prepared to potentially invest in a Wi-Fi extender or mesh system to boost the signal at your door.
Part 2: The Installation – Your Step-by-Step Guide
Now that you’ve chosen your path, let’s get to work.
Safety First: Read This Before You Start!
We will be working with low-voltage electricity. While it’s unlikely to cause a serious shock, a short circuit can damage your new doorbell or your home’s transformer. You MUST turn off the power to your doorbell at your home’s breaker box. This is non-negotiable, like wearing a seatbelt. If you are unsure which breaker it is, turn off the main breaker.
Tools & Materials Checklist:
* Your new video doorbell
* Drill with Phillips head and masonry/wood bits
* Screwdriver
* Wire strippers (optional)
* Level
* For PoE: Cat6 Ethernet cable, RJ45 connectors, crimping tool, PoE switch or injector.
Scenario C: The Professional’s Choice (Running a New PoE Cable)
(Difficulty: – This requires comfort with drilling and basic wiring. If you’re hesitant, consider hiring a low-voltage electrician.)
This is the most involved but most rewarding installation.
- Plan Your Route: Find the best path for the Ethernet cable from your router/network switch to your front door. This may be through a basement, attic, or crawlspace. The goal is to drill as few holes as possible. Important: Do not run Ethernet cable parallel to high-voltage AC power lines for long distances to avoid interference.
-
Drill the Exit Hole: From the inside of your house, carefully drill a hole through the wall to the exterior where the doorbell will be mounted. Start with a small pilot hole to ensure the location is correct on the outside.
-
Run (or “Fish”) the Cable: Push the Ethernet cable from your network switch location to the hole at your door. This can be the trickiest part. “Fish tape” is a special tool that can help you pull wires through walls and ceilings.
-
Terminate the Cable: At both ends of the cable, you will attach an RJ45 connector. Follow the T568B wiring standard (the most common) for the color-coded wires. This is a precise task; watch a few online tutorials if you’re new to it.
-
Connect to Power & Network: Plug one end of the cable into your video doorbell. Plug the other end into a PoE-enabled port on your network switch or into a PoE injector, which then connects to your router.
-
Mount the Doorbell: Securely mount the doorbell bracket to the wall, feeding the excess cable back into the wall cavity. Attach the doorbell to the bracket.
-
Power Up and Configure: Turn the power back on at the breaker. Your doorbell should power up. Follow the manufacturer’s app instructions to connect it to your account. Since it’s a wired connection, it should be detected almost instantly.

Troubleshooting: Common Problems
- Problem: My Wi-Fi doorbell keeps disconnecting.
- Solution: Your signal is too weak. Move your router closer, or install a Wi-Fi mesh node or extender near the front door. If all else fails, running a PoE cable is the permanent fix.
- Problem: My PoE doorbell won’t power on.
- Solution: Check your RJ45 connections. A single wire out of place will cause failure. Verify that your switch or injector is providing PoE power and is compatible (e.g., 802.3af/at). Test the cable with a network cable tester.
Conclusion: Your Home, Smarter and More Secure
Installing a smart video doorbell is a project that pays dividends in both convenience and peace of mind. By taking the time to understand the fundamental differences between a wired and wireless connection, you’ve already made the most important decision. Whether you opted for a quick swap or the satisfying challenge of running a new line, you’ve taken an active role in making your home a safer, more connected place. Now, enjoy the view.